Frostreaver opens May 27, 2026 with a ruleset most TLP veterans have been waiting on for years — Standard plus Scars of Velious live at launch, no Truebox, encounter locking, free trade, 8-week unlocks after that, and Beastlords plus Berserkers available day one. The level cap is 60, since Velious is in from launch. This guide covers the best leveling spots from 1 to 60 across all three eras of content available at launch, plus the strongest multibox combos pulled from the EverQuest Multibox Planner.
How to Use This Guide
The popularity ratings represent the likelihood that a camp will be occupied on a fresh server. A 10/10 means almost everyone goes there. On Frostreaver — the most anticipated TLP in years — those 10/10 camps will be packed wall to wall on day one. The lower-rated alternatives become more valuable than usual.
Each camp has a Frostreaver-adjusted popularity rating that takes the highest score across the Classic, Kunark, and Velious leveling guides. The reason for using the highest is simple — Frostreaver has all three eras live at launch, which means a level 12 zone that was a 10 in Classic is just as relevant as a level 50 zone that was a 10 in Velious. Everyone is leveling fresh through all of it simultaneously.
This guide is filtered to camps rated 8/10 or higher. Camps below that threshold exist but are rarely used. The complete list including 6/10 and 7/10 alternatives is available at everquestguides.com.
Should You Multibox Day One?
Honest answer: probably not.
Frostreaver is going to be packed. Every group-friendly class you log on will get auto-invited to a group within minutes. If you’re a tank or healer you will have non-stop groups all the way to 60 without lifting a finger. Just LFG and play.
If you’re rolling DPS you’ll still get groups but you’re better off forming your own — invite people as you find them in zones, advertise in /lfg, and run your own show. Damage dealers always benefit from being the group leader on a fresh TLP.
If you do want to multibox at launch, the smartest play is logging all your accounts on and finding groups for each individually. Run 2-3 of them in different groups simultaneously. When someone needs a replacement and you have an alt in range, sub them in. You get more XP per hour than boxing a closed group of your own characters because real groups move faster than coordinated multiboxes during the rush.
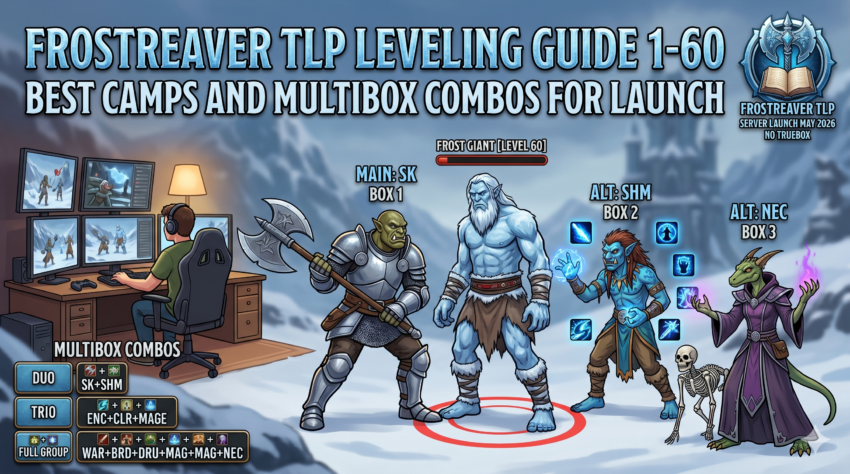
If you’re committed to closed-group boxing, here are the best combinations for Frostreaver based on actual scoring from the multibox planner.
Best 2-Box Combinations for Frostreaver
Traditional (Tank + Healer)
- Shadow Knight / Shaman
- Warrior / Shaman
- Monk / Shaman
The classic SK/Shaman lifetap-and-slow combo is the boxing king for a reason — survivability through lifetap, slow cuts incoming damage in half, dual DoT stacking. Warrior/Shaman trades lifetap for the best raw mitigation in the game. Monk/Shaman gives up plate tanking for the highest melee DPS class in classic EQ.
Pet Tank
- Magician / Shaman
- Magician / Beastlord
- Magician / Enchanter
Mage pet tanks the mob, your second character handles support. Magician pets are the gold standard for boxed tanking in this era. Pair with Shaman for slows and heals, Beastlord for slows and pet support, or Enchanter for charm and crowd control.
Enchanter Charm/Pet Tank
- Enchanter / Druid
- Enchanter / Magician
- Enchanter / Cleric
Charmed mobs do your damage and tank. The highest scoring 2-box mode in the game when played correctly. Risk of charm breaks but DPS is unmatched. Druid pairing gives you ports and heals, Magician adds a second pet, Cleric is the survivability option for when charm goes sideways.
Best 3-Box Combinations
- Shadow Knight / Shaman / Monk
- Shadow Knight / Shaman / Wizard
- Shadow Knight / Shaman / Enchanter
- Warrior / Cleric / Enchanter
- Monk / Shaman / Enchanter
SK/Shaman/Monk is the most popular 3-box meta on every TLP for a reason. Lifetap, slow, and the highest melee DPS class in the game.
Best 6-Box Group Compositions
There are basically three frameworks for a 6-box group. Pick the one that fits how you want to play.
Framework 1 — Melee DPS Group
Tank / Cleric / Shaman / Bard / DPS / DPS
- Tank: Warrior or Shadow Knight
- DPS slots: pick any two from Rogue, Monk, Berserker
This is the standard meta group. Bard runs songs that buff melee — Bards and melee DPS pair naturally because of the haste, attack, and mana songs running passively. Cleric heals, Shaman slows and buffs, and your two DPS slots get to play whatever melee class you want.
If you don’t need maximum heals, drop the Cleric and run a third DPS instead — the Shaman covers heals, the Bard sustains mana, and you get a meaningful damage upgrade for the trade-off.
Framework 2 — Caster DPS Group
Tank / Cleric / Shaman / Enchanter / DPS / DPS
- Tank: Warrior or Shadow Knight
- DPS slots: pick any two casters
- Mage / Mage works for double pet damage and durability
- Mage / Wizard adds ports for travel
- Wizard / Wizard for raw nuke output if you don’t need ports
Enchanter takes the place of Bard here because casters and Enchanters pair naturally — Clarity for mana regen, mez and slow for crowd control, charm if you want to add a third damage source on top. Same heal/slow/sustain backbone as Framework 1 but tuned for caster damage instead of melee.
Same Cleric drop applies — if you can survive without a dedicated healer, swap Cleric for a third DPS caster.
Framework 3 — Charm-Focused Group
Enchanter / Bard / Cleric / Mage / Mage / Wizard
- Enchanter charms and runs the show
- Bard plays mez song on the charmed pet as a safety net so it doesn’t break and turn on you
- Cleric heals
- Two Mages provide pet off-tanks and DPS
- Wizard adds nuke damage and ports for travel
This is the high-skill, high-reward setup. Charm DPS is unmatched but breaks at the worst times, which is exactly what the Bard mez song solves. Two Mage pets means you have damage sponges if charm goes sideways. Wizard handles travel and burst damage.
A Word on Picks
Frostreaver will spawn instanced “pick” copies of zones once population thresholds are hit. On launch day every popular zone — Unrest, Befallen, Sol A, Lower Guk, Sebilis — will have multiple picks running at the same time.
Picks help, but don’t expect them to solve everything. The good camps are still contested even with picks open because people will pick-swap. Someone shows up to find your camp taken, hops to pick 2, finds it taken there too, hops to pick 3, takes the camp from whoever just got there because they wanted it more. The really desirable camps in any zone — Sol A Bartender, LGuk Bedroom, Sebilis Disco, Chardok Vault — get cycled through picks all night long.
Two practical takeaways. First, if you find an open camp on a less-popular pick, hold it. Don’t bounce around looking for greener grass. Every minute spent zoning between picks, running back to your camp, or recovering from a death is XP you’re not earning. I’ve spent entire sessions chasing better camps and ended up barely leveling — meanwhile someone parked at a 7/10 alternative for the same time has out-leveled me by two or three levels. That’s the whole reason this guide exists. The “best” camp you never get to camp is worth less than the average camp you actually grind in.
Second, the lower-popularity alternatives in this guide become much more valuable on a packed launch since they don’t get pick-swapped over. A 7/10 or 8/10 camp on pick 4 will sit empty for hours while everyone fights over the 10/10s on picks 1 and 2.
Recommended Leveling Path
This is the path most groups should follow. Alternatives are listed below grouped by zone so you can scan for what’s closest to your situation.
Levels 1-10
Most classes start in their racial cities and pick up newbie quests. Once you outgrow those (around 4-6), where you go depends on which continent you started on.
Primary path (Antonica): Befallen Front Entrance from 4 to 10 covers the entire range. Power-level friendly if you have a higher level character helping. Closest large dungeon to Freeport, Qeynos, and most Antonica starting cities.
Alternatives by continent:
- Antonica (Human, Half Elf, Halfling, Erudite, Barbarian, Wood Elf, Gnome): Blackburrow Western Side 4-12 (Qeynos area), Crushbone Entrance 1-5 and West Side 7-12 (north of Faydwer but accessible), Najena Entrance 8-14 (Lavastorm area).
- Faydwer (Wood Elf, High Elf, Dark Elf, Half Elf, Dwarf, Gnome): Crushbone Entrance 1-5, Greater Faydark orc camps 6-10, Steamfont Mountains North East 8-13, Crushbone West Side 7-12.
- Antonica/Eastern (Dark Elf, Erudite, Ogre, Troll, Iksar near Erudin): Nektulos Forest Northwestern Orc Camp 8-12, Najena Entrance 8-14, Field of Bone Bonecrawlers 1-4 (Iksar only, accessible from Cabilis), Field of Bone Center Pit 7-15 (Iksar).
Levels 10-20
Unrest is the dominant zone but it’s specifically on Faydwer (north of Greater Faydark). Players starting on Antonica or Kunark have other strong options that don’t require boating across the world.
Primary path (Faydwer side): Unrest Courtyard 10-17, then Unrest 1st Floor 16-25, transition to Upper Guk Shinlord/Necro at 19-20 to push into the next range.
Primary path (Kunark side): Kurns Tower First Floor 10-16 then Bottom Floor 14-19, transition to Field of Bone Center Pit or Lake of Ill Omen at 17-19.
Alternatives by zone:
- Antonica: North Ro Undead Ruins 10-15 (fastest respawn in the range), South Ro Crocs 11-19, Eastern Karana Carrion Spiders 10-13 and Craig Spiders 18-20, Ocean of Tears Aviak Island Middle 14-18 and Skeleton Island 18-20.
- Faydwer: Crushbone Castle 12-18, Unrest Courtyard 10-17 and 1st Floor 16-25, Permafrost Keep 16-25 (boat from Faydwer to Halas).
- Kunark: Kurns Tower First and Bottom Floors 10-19, Field of Bone Iksar Manslayers 14-19 and Center East 12-17, The Overthere Northeast Wall 14-19, Lake of Ill Omen Field Killing 10-16 and North of Windmill 14-18.
Levels 20-30
Sol A and Mistmoore dominate, with Tower of Frozen Shadow 1st Floor opening Velious as a transition once you hit 24+.
Primary path: Sol A Bridge 19-24, Sol A Bartender Room 24-28, Castle Mistmoore Graveyard 26-33 to transition into the 30s. TOFS 1st Floor at 24-31 is the Velious alternative if you want to push north for a different vibe.
Alternatives by zone:
- Castle Mistmoore: Entrance 19-23, Graveyard/Fake Wall 26-33
- Sol A: Bridge to North 19-24, Inferno Goblin Captain 23-27, Bartender Room 24-28, Goblin High Shaman 26-31, King Room 27-30
- Upper Guk: Shinlord/Necro 19-29
- Lake of Ill Omen: Sarnak Castle Entrance 21-25, Castle Inside (Chancellor) 21-25
- High Keep: Goblins Basement 22-33
- Crypt of Dalnir: First Floor 25-29, Second Floor 25-29, Third Floor 25-33
- Frontier Mountains: Giant Fort 26-35
- The Overthere: Sarnak Buildings 26-37
- Lower Guk: Bedroom 27-34
- Tower of Frozen Shadow: 1st Floor 24-31, 2nd Floor 27-33, 6th Floor 27-37
Levels 30-40
Lower Guk takes over and stays dominant. Tower of Frozen Shadow continues to be excellent for Velious-flavored leveling — multiple floors covering this entire range.
Primary path: Lower Guk Bedroom 27-34, Assassin/Executioner 34-38, Frenzy/Sentinel 34-43 to push toward 40. Sol B Kobalt King Room 34-42 if Guk is contested. TOFS floors 2 through 7 cover 27-40 for the Velious alternative.
Alternatives by zone:
- Castle Mistmoore: Inside Castle 29-39
- The Overthere: Skyfire Ramp 29-38, South Wall 29-38
- Kaesora: East Side by Librarian 29-35, West Side by Xalgoz 31-40
- Lower Guk: Crusader 30-42, Assassin/Executioner 34-38, Frenzy/Sentinel 34-43, Herbalist/King 36-49
- Kael Drakkel: SE Wing Entrance Giants 31-36
- Tower of Frozen Shadow: 3rd Floor 31-37, 4th Floor 32-37, 5th Floor 36-40, 7th Floor 34-40
- Dreadlands: Forest Giant Castle 32-41, North/South Castle Walls 33-40
- Rathe Mountains: Hill Giants 32-36
- Sol B: Noble Camp 33-38, Kobalt King 34-42
- City of Mist: Entrance/Bridge 33-44, Stables 33-49, Temple 36-49, Center Courtyard 36-49, Outside Castle 38-52, Inside Castle 39-52
- Burning Woods: Giant Fort NW 35-42, West Crater 37-47
- Wakening Lands: Frost Giants 36-45, Geonid Cave 39-47
- Eastern Wastes: Frost Giant Fort 37-43
- Cobalt Scar: Wyverns 39-42
Levels 40-50
Old Sebilis becomes the king. Karnor’s Castle and Howling Stones offer Kunark alternatives. Velketor’s Labyrinth opens up Velious endgame leveling.
Primary path: Lower Guk Frenzy 34-43 if you carried over, OoT Cyclops Island 38-42 for an easier outdoor option, Old Sebilis Bartender/Disco 41-49 once you can hit Sebilis difficulty. Karnor’s Castle Warlord 42-50 as the Kunark alternative.
Alternatives by zone:
- Karnor’s Castle: Captain 40-44, Southroom 40-45, Northroom 40-45, Warlord/Hand 42-50, Jailer/Cells 42-50
- Old Sebilis: Mobs Near Entrance 41-50, Bartender/Chef 41-51, Disco 1/2 42-49, King 48-54
- Howling Stones: North Wing 42-50, West Wing 43-49, South Wing 46-52
- Ocean of Tears: Cyclops Island 38-42, Elite Goblin Island 42-48
- Sol B: Efreeti Lord 42-50
- Kael Drakkel: Outside North End 43-50
- Chardok: Fort Entrance 43-53, Caves/Slave Area 47-52
- Velketor’s Labyrinth: Entrance 45-47, Kobolds East 46-51
- The Hole: Docks 45-51, Sword 1/Pond 45-51
- Dragon Necropolis: Phase Spiders 47-50, Chetari 46-58
- Siren’s Grotto: Sirens East 48-53
Levels 50-60
The endgame zones. This is where Velious really earns its keep — Velketor’s, Dragon Necropolis, and the inside of Kael all carry you through 60.
Primary path: Old Sebilis King 48-54, Chardok Fort Entrance 43-53 transitioning into Vault/Bridgekeeper at 51+, Velketor’s Labyrinth Kobolds East 46-51 then Gargoyles 52-56. Kael Drakkel Inside 50-58 if you can hold faction.
Alternatives by zone:
- Howling Stones: East Wing 50-54
- Kael Drakkel: Inside North End 50-58
- Chardok: Vault 51-58, Bridgekeeper 51-57, Gravemaster 51-55, Herbalist 52-55, Korocust 53-58, Kennels 55-57
- Velketor’s Labyrinth: Gargoyles/Sentinels 52-56
- Old Sebilis: Juggernauts 55-60
- Siren’s Grotto: Sirens in Water 55-58
- The Hole: Undead Towers 55-60
Frostreaver Camp List (8/10 Popularity and Above)
Camps appear in every level band where they cover 5+ levels of the range. Wide-range camps like City of Mist (33-49) appear in both 30-40 and 40-50.
Levels 1-10
| Pop | Levels | Zone | Camp | Size | Respawn |
|---|---|---|---|---|---|
| 10/10 | 4–10 | Befallen | Front Entrance and first level 4 doors, power level friendly | 15+ | ~8 min |
| 8/10 | 4–12 | Blackburrow | Western Side, jump down ramp head through doors | 15+ | ~8 min |
| 8/10 | 6–10 | Greater Faydark | Orc Camps in North and Outside Crushbone | 15+ | ~5 min |
| 8/10 | 7–12 | Crushbone | West Side of map Slaver Caves/Scoutsman/Prophet | 6-10 | ~8 min |
Levels 10-20
| Pop | Levels | Zone | Camp | Size | Respawn |
|---|---|---|---|---|---|
| 10/10 | 10–17 | Unrest | Courtyard Area | 15+ | ~5 min |
| 10/10 | 10–16 | Kurns Tower | First floor of skeletons | 15+ | ~14.5 min |
| 10/10 | 14–19 | Kurns Tower | Bottom Floor with moles/skeletons | 15+ | ~14.5 min |
| 9/10 | 10–15 | North Ro | Undead Ruins | 6-10 | ~30 sec |
| 9/10 | 11–19 | South Ro | Crocs/Caimans @ docks | 15+ | ~2-3 min |
| 9/10 | 14–19 | The Overthere | Field Killing, Pull to NorthEast Wall area | 15+ | ~5 min |
| 9/10 | 18–20 | Eastern Karana | Craig Spiders in field | 15+ | ~5 min |
| 8/10 | 7–15 | Field of Bone | Center Pit Area through zone middle, scorpions etc | 15+ | ~6 min |
| 8/10 | 10–13 | Eastern Karana | Carrion Spider/Chasm Crawlers in field | 15+ | ~5 min |
| 8/10 | 10–16 | Lake of Ill Omen | Field Killing North of Lake | 15+ | ~13.5 min |
| 8/10 | 12–18 | Crushbone | Castle Area with Emperor Crush | 6-10 | ~8 min |
| 8/10 | 13–22 | Warsliks Woods | Goblin Fort North Central (3000,400) | 15+ | ~11.5 min |
| 8/10 | 14–18 | Ocean of Tears | Far West Aviak Island Middle Circular Layer | 15+ | ~16 min |
| 8/10 | 18–20 | Ocean of Tears | Skeleton Island, 0, -5500 | 15+ | ~16 min |
Levels 20-30
| Pop | Levels | Zone | Camp | Size | Respawn |
|---|---|---|---|---|---|
| 10/10 | 19–23 | Castle Mistmoore | Entrance and tunnels up to Graveyard | 11-15 | ~20.5 min |
| 10/10 | 19–24 | Sol A | Bridge up to room in North to Predator/Foreman | 15+ | ~16.5 min |
| 10/10 | 19–29 | Upper Guk | Froglok Shinlord/Necromancer camp | 11-15 | ~13.5 min |
| 10/10 | 21–25 | Lake of Ill Omen | Sarnak Castle Entrance area | 15+ | ~13.5 min |
| 10/10 | 21–25 | Lake of Ill Omen | Inside Castle Chancellor Room / Tunnels | 15+ | ~13.5 min |
| 10/10 | 24–28 | Sol A | Bartender Room and surrounding to south and then east | 15+ | ~16.5 min |
| 10/10 | 24–31 | Tower of Frozen Shadow | 1st Floor | 15+ | ~15.5 min |
| 10/10 | 26–33 | Castle Mistmoore | Graveyard + fake wall theres a level 40 in bottom room | 11-15 | ~20.5 min |
| 10/10 | 27–30 | Sol A | King Room in southwest | 6-10 | ~16.5 min |
| 10/10 | 27–33 | Tower of Frozen Shadow | 2nd Floor | 15+ | ~15.5 min |
| 9/10 | 16–25 | Unrest | 1st Floor Center of Castle | 15+ | ~16 min |
| 9/10 | 22–33 | High Keep | Goblins in basement, top level 22-25, bottom up to 33 | 15+ | ~10 min |
| 9/10 | 25–30 | Unrest | Fireplace up Stairs | 15+ | ~16 min |
| 9/10 | 25–35 | Unrest | Basement Area through hidden door | 15+ | ~16 min |
| 9/10 | 25–29 | Crypt of Dalnir | First Floor | 15+ | ~11 min |
| 9/10 | 25–29 | Crypt of Dalnir | Second Floor | 15+ | ~11 min |
| 9/10 | 25–33 | Crypt of Dalnir | Third Floor | 15+ | ~11 min |
| 9/10 | 26–31 | Sol A | Goblin high Shaman very south and prison area | 6-10 | ~16.5 min |
| 8/10 | 18–27 | Warsliks Woods | Giant Fort South Central (-500,1300) | 11-15 | ~11.5 min |
| 8/10 | 20–26 | Lake of Ill Omen | North Goblin Cavens | 15+ | ~13.5 min |
| 8/10 | 22–29 | Upper Guk | Nokta Shaman area and east | 15+ | ~13.5 min |
| 8/10 | 22–33 | High Keep | Guards through zone if you don’t care about faction | 15+ | ~20 min |
| 8/10 | 23–27 | Sol A | Inferno Goblin Captain in very north and area | 15+ | ~16.5 min |
Levels 30-40
| Pop | Levels | Zone | Camp | Size | Respawn |
|---|---|---|---|---|---|
| 10/10 | 27–34 | Lower Guk | Bedroom with Frogloks,skeletons,bats,spiders | 15+ | ~26 min |
| 10/10 | 27–37 | Tower of Frozen Shadow | 6th Floor | 15+ | ~15.5 min |
| 10/10 | 29–39 | Castle Mistmoore | Inside Castle Room for more than one regular group | 15+ | ~20.5 min |
| 10/10 | 31–40 | Kaesora | West Side by Xalgoz | 15+ | ~16.5 min |
| 10/10 | 31–36 | Kael Drakkel | Giants at Entrance to the South East Wing | 15+ | ~20 min |
| 10/10 | 31–37 | Tower of Frozen Shadow | 3rd Floor | 15+ | ~15.5 min |
| 10/10 | 32–36 | Rathe Mountains | Hill Giants / Cyclops NE area | 6-10 | ~3-7 min |
| 10/10 | 32–37 | Tower of Frozen Shadow | 4th Floor | 15+ | ~15.5 min |
| 10/10 | 33–49 | City of Mist | Stables (-230,-500) | 15+ | ~16 min |
| 10/10 | 34–38 | Lower Guk | Assassin/Executioner Area | 15+ | ~26 min |
| 10/10 | 34–42 | Sol B | Kobalt King/Priest/Champion rooms | 6-10 | ~19 min |
| 10/10 | 34–43 | Lower Guk | Frenzy/Sentinel Area | 15+ | ~26 min |
| 10/10 | 34–40 | Tower of Frozen Shadow | 7th Floor | 15+ | ~15.5 min |
| 10/10 | 36–40 | Tower of Frozen Shadow | 5th Floor | 15+ | ~15.5 min |
| 10/10 | 38–42 | Ocean of Tears | Cyclops Island, 2000, -4000 | 15+ | ~16 min |
| 9/10 | 25–35 | Unrest | Basement Area through hidden door | 15+ | ~16 min |
| 9/10 | 26–35 | Frontier Mountains | Giant Fort in Center | 15+ | ~10 min |
| 9/10 | 29–34 | Castle Mistmoore | Castle Entrance and surrounding | 11-15 | ~20.5 min |
| 9/10 | 29–38 | The Overthere | Field Killing, Pull to Skyfire Ramp | 15+ | ~5 min |
| 9/10 | 29–38 | The Overthere | Field Killing, Pull to South Wall near passage to FM | 15+ | ~5 min |
| 9/10 | 29–35 | Kaesora | East Side by Librarian | 15+ | ~16.5 min |
| 9/10 | 30–42 | Lower Guk | Crusader area | 15+ | ~26 min |
| 9/10 | 33–38 | Sol B | Noble Camp from entrance or off to left | 6-10 | ~19 min |
| 9/10 | 33–40 | Dreadlands | Pull to North or South Castle Walls | 15+ | ~16 min |
| 9/10 | 33–44 | City of Mist | Entrance/Bridge | 11-15 | ~16 min |
| 9/10 | 35–42 | Burning Woods | Giant Fort in Northwest | 6-10 | ~5 min |
| 9/10 | 38–41 | The Hole | Entrance out to bridge room | 11-15 | ~17 min |
| 9/10 | 38–42 | The Hole | Rats in Cellars (named are higher level) | 11-15 | ~17 min |
| 8/10 | 26–37 | The Overthere | Sarnak Buildings South of Pit (1500,600) | 11-15 | ~5 min |
| 8/10 | 28–35 | Crystal Caverns | Terror Caves | 15+ | ~12 min |
| 8/10 | 30–37 | Crystal Caverns | Spider Area (South east) | 6-10 | ~12 min |
| 8/10 | 31–45 | Eastern Wastes | Center Orc Camp Chief Ry’gorr Level 45 | 15+ | ~21.5 min |
| 8/10 | 32–41 | Dreadlands | Forest Giant Castle (-500,2000) | 6-10 | ~16 min |
| 8/10 | 32–38 | The Overthere | Scorpions in Pit / In Buildings off of Pit | 15+ | ~5 min |
| 8/10 | 33–35 | Sol B | Pool Room to North no named | 11-15 | ~19 min |
| 8/10 | 33–40 | Burning Woods | Sarnak Fort NE Corner | 15+ | ~5 min |
| 8/10 | 35–41 | Timorous Deep | Spiroc Fort NW (5700,1000) | 15+ | ~10.5 min |
| 8/10 | 37–43 | Eastern Wastes | Frost Giant Fort (-1750,3000) | 6-10 | ~21.5 min |
Levels 40-50
| Pop | Levels | Zone | Camp | Size | Respawn |
|---|---|---|---|---|---|
| 10/10 | 33–49 | City of Mist | Stables (-230,-500) | 15+ | ~16 min |
| 10/10 | 36–49 | City of Mist | Temple (150,-600) | 15+ | ~16 min |
| 10/10 | 41–51 | Old Sebilis | Bartender/Chef West Wing Area | 15+ | ~21.5 min |
| 10/10 | 42–48 | Ocean of Tears | Elite Goblin Island, South Center part of zone | 15+ | ~10 min |
| 10/10 | 42–50 | Sol B | Efreeti Lord Camp and guardians to west | 6-10 | ~19 min |
| 10/10 | 42–49 | Old Sebilis | Disco 1/2, East Area | 15+ | ~21.5 min |
| 10/10 | 42–50 | Karnor’s Castle | Warlord/Hand, Far East into castle | 15+ | ~21.5 min |
| 10/10 | 43–53 | Chardok | Fort Entrance | 15+ | ~16 min |
| 10/10 | 43–50 | Kael Drakkel | Giants on North End but around the outside | 15+ | ~20 min |
| 10/10 | 45–51 | The Hole | The Docks and outward | 15+ | ~17 min |
| 10/10 | 45–51 | The Hole | Sword 1/Pond Area | 15+ | ~17 min |
| 10/10 | 45–47 | Velketor’s Labyrinth | Entrance and Spirals up | 15+ | ~16 min |
| 10/10 | 46–51 | Velketor’s Labyrinth | Kobalds East Side | 15+ | ~16 min |
| 10/10 | 47–52 | Chardok | Caves/Slave Area | 15+ | ~16 min |
| 10/10 | 47–50 | Dragon Necropolis | Phase Spiders Scattered | 15+ | ~12 min |
| 9/10 | 36–49 | Lower Guk | Herbalist/King Area | 15+ | ~26 min |
| 9/10 | 36–49 | City of Mist | Center Courtyard South Wall (-240,-265) | 15+ | ~16 min |
| 9/10 | 36–45 | Wakening Lands | Frost Giants (east wall by Kael and camps) | 15+ | ~12 min |
| 9/10 | 37–47 | Burning Woods | Various Mobs West Crater | 15+ | ~5 min |
| 9/10 | 38–52 | City of Mist | Outside of Castle (setup to pull to -235,35) | 15+ | ~16 min |
| 9/10 | 39–47 | Lower Guk | Arch Mage/Ghoul Lord area | 11-15 | ~26 min |
| 9/10 | 39–52 | City of Mist | Inside Black Reaver Area and Castle (need key) | 15+ | ~16 min |
| 9/10 | 39–42 | Cobalt Scar | Wyverns Along Edges (can be quad kited by druids) | 15+ | ~16 min |
| 9/10 | 39–47 | Wakening Lands | Geonid Cave (-3000,-1400) | 15+ | ~12 min |
| 9/10 | 40–44 | Karnor’s Castle | Captain Camp (first area coming in and up) | 15+ | ~21.5 min |
| 9/10 | 40–45 | Karnor’s Castle | Southroom (-20,-250) | 15+ | ~21.5 min |
| 9/10 | 40–45 | Karnor’s Castle | Northroom (50,-250) | 15+ | ~21.5 min |
| 9/10 | 41–50 | Old Sebilis | Mobs near entrance | 15+ | ~21.5 min |
| 9/10 | 42–50 | Howling Stones | North Wing (The Crypt Keeper) | 15+ | ~15 min |
| 9/10 | 42–50 | Karnor’s Castle | Jailer/Cells center basement of castle | 15+ | ~21.5 min |
| 9/10 | 43–49 | Howling Stones | West Wing (Skeletal Procurator) | 15+ | ~15 min |
| 9/10 | 46–52 | Howling Stones | South Wing (The Specter Spiritualist) | 15+ | ~15 min |
| 8/10 | 31–45 | Eastern Wastes | Center Orc Camp Chief Ry’gorr Level 45 | 15+ | ~21.5 min |
| 8/10 | 38–44 | Sol B | Bats, Beetles, and Spiders in the caves to south | 11-15 | ~19 min |
| 8/10 | 41–43 | Timorous Deep | Southwest Raptor Island (-8000,3000) | 15+ | ~10.5 min |
| 8/10 | 42–45 | Howling Stones | Basement (Drop off the side) | 15+ | ~15 min |
Levels 50-60
| Pop | Levels | Zone | Camp | Size | Respawn |
|---|---|---|---|---|---|
| 10/10 | 46–58 | Dragon Necropolis | Chetari (Rat Caves) | 15+ | ~12 min |
| 10/10 | 48–54 | Old Sebilis | King, South Center Area | 15+ | ~21.5 min |
| 10/10 | 50–54 | Howling Stones | East Wing (Drusella Sathir) | 15+ | ~15 min |
| 10/10 | 50–58 | Kael Drakkel | Giants on North End on the Inside Areas | 15+ | ~20 min |
| 10/10 | 51–58 | Chardok | Vault Area | 15+ | ~16 min |
| 10/10 | 51–57 | Chardok | Bridgekeeper Area | 15+ | ~16 min |
| 10/10 | 51–55 | Chardok | Gravemaster Area | 15+ | ~16 min |
| 10/10 | 52–55 | Chardok | Herbalist Area | 15+ | ~16 min |
| 10/10 | 52–56 | Velketor’s Labyrinth | Gargoyle/Sentinels | 15+ | ~16 min |
| 10/10 | 53–58 | Chardok | Korocust area | 15+ | ~16 min |
| 10/10 | 55–60 | The Hole | Undead Towers | 15+ | ~17 min |
| 10/10 | 55–57 | Chardok | Kennels | 15+ | ~16 min |
| 10/10 | 55–60 | Old Sebilis | Juggernauts, very southeast near Trak | 15+ | ~21.5 min |
| 9/10 | 48–53 | Siren’s Grotto | Sirens in Eastern Area | 15+ | ~22.5 min |
| 9/10 | 55–58 | Siren’s Grotto | Sirens in the Water in North | 15+ | ~22.5 min |
A Few Notes on the Camp Data
The columns mean what they say — Pop is how often you’ll find it occupied, Levels is the level range of the mobs, Camp is the description and pull location, Size is how many mobs are in the immediate area, and Respawn is how fast they come back.
The faster the respawn, the more XP per hour you can extract from a camp — but faster respawn camps tend to have higher competition. North Ro at 30-second respawn is the fastest leveling option in the 10-15 range but you will fight for it on day one.
Lower Guk dominates the 30-40 range with multiple 10/10 camps. Sol B and Lower Guk run parallel through the 30s into the 40s. Old Sebilis takes over from 41 onward and stays relevant deep into 50+. Chardok is the king of the high 50s if your group can handle the pulls. Velketor’s Labyrinth and Dragon Necropolis carry late-50s through 60 for groups that want a Velious-flavored alternative to Sebilis and Chardok.
For Velious-specific zones, Tower of Frozen Shadow is the best leveling option from 24 all the way to 40 on Frostreaver — multiple 10/10 floors scale through that entire range. Kael Drakkel runs from 31 all the way to 58 if you can hold faction.
Combo scores from the EQ Multibox Planner
Camp data merged from the Classic, Kunark, and Velious leveling guides